Measuring the Speed of Sound Using an Ultrasonic Sensor and Oscilloscope
2026-04-01 | By Shruti Garg
Ultrasonic sensors are widely used in electronics projects, from robotics and automation to proximity detection and level sensing. While these sensors are often used to calculate distance, they can also be used to explore a core concept of physics: the speed of sound.
In this blog, I will walk through a simple experiment that uses an ultrasonic sensor and oscilloscope to measure how fast sound travels through the air. I will examine how ultrasonic sensors work, how timing measurements are captured, and some real-world factors that influence the accuracy.
How do Ultrasonic Sensors Work?
Ultrasonic sensors operate by emitting a high-frequency sound pulse, typically above the range of human hearing. These sensors detect the echo after it reflects off an object, measuring the time it takes for the sound wave to travel to the object and return.
Looking at the relationships: Speed = Distance / Time:
- If the distance to the reflecting surface is known, the speed of sound can be calculated by measuring the total travel time of the pulse.
Setting up the experiment:
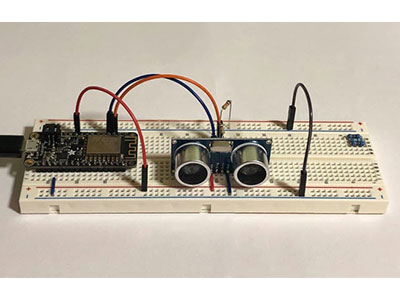
To explore this concept, we create a basic ultrasound measurement setup:
You need:
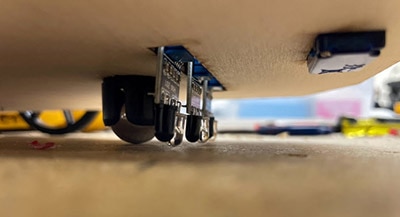
- An ultrasonic sensor positioned at one end of a measurement mat
- A flat reflector placed at the opposite end
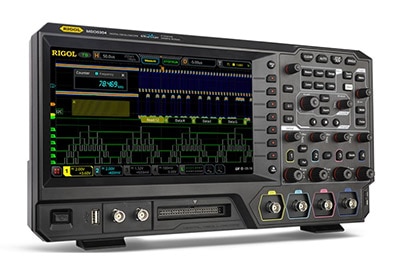
- A digital oscilloscope to visualize the sensor’s output signal
- A mat fixed at a certain length (in this case, 0.597 meters)
By triggering on the rising edge of the waveform, we are able to consistently measure the time between pulse emission and echo detection.
To measure the speed of sound, you need to capture the ultrasonic pulse on an oscilloscope and determine how long it takes for the echo to return. Below is how to perform the experiment:
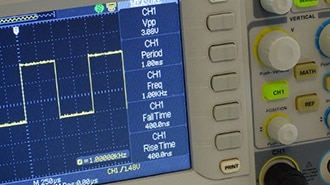
1. Connect the sensor to the Oscilloscope
- Connect the sensor’s output (Echo pin or receiver output) to one oscilloscope channel. Connect the ground from your circuit to the oscilloscope ground. If you are using a microcontroller, you may trigger the pulse from a digital output pin.
2. Configure the Oscilloscope
- Use a time scale in a millisecond range
- A voltage scale appropriate for your sensor’s logic level (usually 3.3 V or 5 V systems)
- Edge trigger mode set to rising edge
- Trigger level set to slightly above 0 V, so the scope triggers when the pulse begins
- Keep adjusting these settings until the pulse appears stable on the screen
3. Identify the Transmit and Echo Signals
- When the sensor emits an ultrasonic burst, you will see a voltage transition. The echo signal will appear shortly afterward as another transition.
- The key measurement is the time difference between the start of the transmitted pulse and the beginning of the echo pulse.
Use one of the following methods:
- Oscilloscope cursors/markers (most accurate)
- Counting horizontal divisions and multiplying by the time-per-division setting
4. Record the Round-Trip Time
- The measured duration represents the time it takes for sound to:
- Travel from the sensor to the target
- Reflect off the surface
- Return to the sensor
5. To convert the time to speed, measure the one-way distance between the sensor and the reflecting surface, multiply the distance by 2 (since the sound travels down and back), and then divide the total distance by the measured time.
Speed of Sound = (2 x Distance)/(Measured Time)
If your result is close to 343 m/s, your setup is working correctly.
Some sources of error to consider:
Some factors can affect ultrasonic measurements, especially in non-controlled environments,
such as:
Sensor alignment: Small angular errors can reduce echo strength
Ambient noise: Reflections and background sound can interfere with timing
Electrical Errors: Wiring inconsistencies can affect the signals
Why does this matter?
Ultrasonic sensors are used in various engineering applications, such as obstacle avoidance in robotics, automated parking systems, etc. By examining the signals behind the ultrasonic measurements, you can gain a deeper understanding of how sensor data is generated and ways to improve the accuracy in real-world designs.
This experiment is helpful to understand how a simple ultrasonic sensor and oscilloscope can be used to measure the speed of sound. It highlights core physics concepts and how to apply these principles to practical engineering systems used every day. Whether you are working on a class project or developing a real-world system, understanding what’s happening behind the sensor output can lead to better designs and more accurate and reliable measurements.