Arduino Proximity Sensor -Activated OLED Display for Smart & Industrial
2026-04-13 | By Ron Cutts
License: GNU Lesser General Public License Bluetooth / BLE Displays Wifi Arduino ESP32
Project Description:
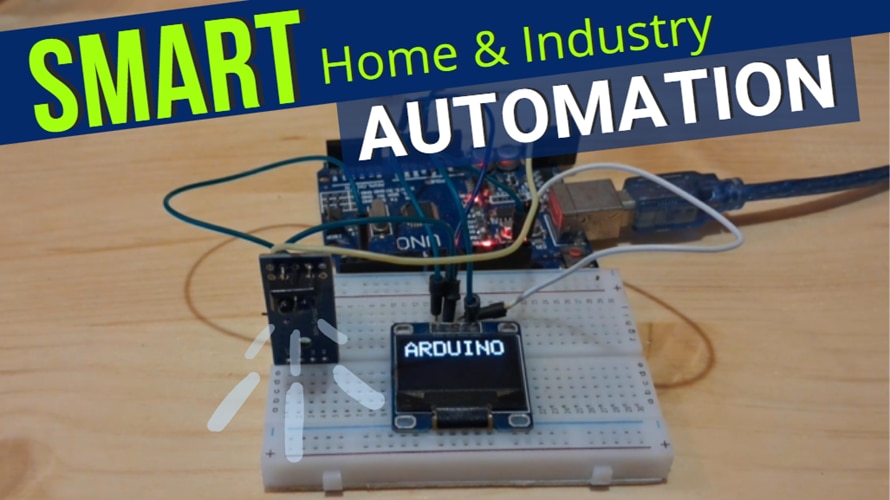
A compact and efficient smart display system that uses an IR obstacle sensor to detect motion or presence. When a hand or object is extended towards the sensor, an OLED display automatically turns on, showing useful information such as status updates, sensor readings, or notifications. After 3 seconds of inactivity, the display turns off to conserve power.
Potential Applications:
✔ Smart Home Automation – Display room temperature, security alerts, or appliance statuses only when someone is nearby.
✔ Industrial Use – Hands-free status monitoring in factories, reducing distractions and energy consumption.
✔ Smart Gadgets – Interactive control panels for IoT devices that activate only when needed.
✔ Energy-Saving Display Systems – Reduce power consumption in battery-operated or low-power devices.
Watch the video!
Learn more about Visuino: What is Visuino
What You Will Need
Arduino UNO (Or any other Arduino)
Visuino program: Download Visuino


The Circuit
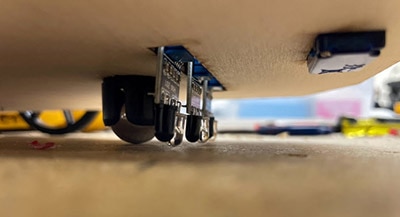
Connect Obstacle avoidance sensor pin[VCC] to Arduino pin[5V]
Connect Obstacle avoidance sensor pin[GND] to Arduino pin[GND]
Connect Obstacle avoidance sensor pin[D0] to Arduino digital pin[2]
Connect OLED Display pin [SCL] to Arduino pin [SCL]
Connect OLED Display pin [SDA] to Arduino pin [SDA]
Connect OLED Display pin [VCC] to Arduino pin [5v]
Connect OLED Display pin [GND] to Arduino pin [GND]

Start Visuino, and Select the Arduino Board Type
Start Visuino as shown in the first picture. Click on the "Tools" button on the Arduino component (Picture 1) in Visuino. When the dialog appears, select "Arduino UNO" as shown in Picture 2


In Visuino Add & Set Components
Add "Debounce Button" component
Add "Digital Multi Source" component
Add "Delay" component
Add "Toggle(T) Flip-Flop" component
Add "OLED I2C" component
Select "Button1" and in the properties window set "Debounce Interval (mS)" to 10
Select "Delay1" and in the properties window set "Interval" to 3000000. You can adjust this by setting any other value
Select "DisplayOLED1" and in the properties window, select "Power On." Click on the pin icon and select "Boolean SinkPin"
Double-click on "DisplayOLED1" and in the Elements window, drag "Draw Text" to the left side, and in the properties window, set "Size" to 3 and "Text" to ARDUINO or any other text


In Visuino Connect Components
Connect Arduino digital pin[2] to "Button1" pin [In]
Connect "Button1" pin [Out] to "MultiSource1" pin [In]
Connect "MultiSource1" pin [0] to "TFlipFlop1" pin [Set]
Connect "MultiSource1" pin [1] to "Delay1" pin [Start]
Connect "Delay1" pin [Out] to "TFlipFlop1" pin [Reset]
Connect "TFlipFlop1" pin [Out] to "DisplayOLED1" pin [Power On]
Connect "DisplayOLED1" pin [I2C] to Arduino pin [I2C]


Generate, Compile, and Upload the Arduino Code
In Visuino, at the bottom, click on the "Build" tab, make sure the correct port is selected, then click on the "Compile/Build and Upload" button.

Play
Congratulations! You have completed your project with Visuino. Also attached is the Visuino project that I created for this tutorial; you can download it and open it in Visuino: https://www.visuino.eu