Mfr Part # 3333
CIRCUIT PLAYGROUND EXPRESS
Adafruit Industries LLC
License: See Original Project Circuit Playground
Courtesy of Adafruit
Guide by Liz Clark
Overview
If Halloween has snuck up on you, have no fear! This project gets you from zero to flapping vampire bat with no soldering required. You'll use a Circuit Playground Express, two servo motors and CircuitPython to build this fun Halloween prop.
The bat's wings are mounted to two servo motors that move up and down to create a flapping effect. The servo motors have alligator clips that attach to the pads on the Circuit Playground Express.
The NeoPixels on the Circuit Playground Express animate with a swirly comet pattern.
Prerequisite Guides
Adafruit Circuit Playground Express
Using Servos With CircuitPython and Arduino
Parts
This project also works with a Circuit Playground Bluefruit if the Circuit Playground Express is not available.
Circuit Diagram
Right Wing Servo
Servo GND to board GND (black wire)
Servo VIN to board 3.3V (red wire)
Servo Data to board A6 (white wire)
Left Wing Servo
Servo GND to board GND (black wire)
Servo VIN to board 3.3V (red wire)
Servo Data to board A3 (white wire)
3D Printing
The Halloween bat may be assembled with 3D printed parts, described below. The pieces could also be cut from other materials, such as wood, acrylic or even cardboard.
The STL files can be downloaded directly here or from Thingiverse.
The Circuit Playground and servo motors mount to the body of the bat. The NeoPixels are visible in the cutout for the board.
Each wing mounts to a servo with M2 screws.
You can paint the bat's fangs and eyes to make them standout. Googly Eyes work too.
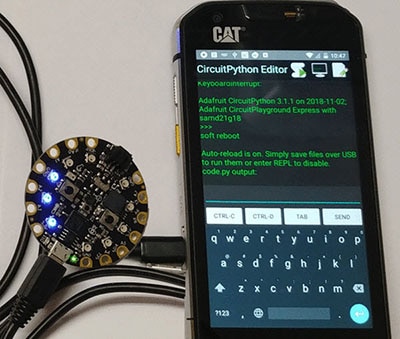
CircuitPython
As we continue to develop CircuitPython and create new releases, we will stop supporting older releases. If you are running an older version of CircuitPython, you need to update. Click the button below to download the latest!
Install or update CircuitPython!
Follow this quick step-by-step for super-fast Python power :)
Download the latest version of CircuitPython for this board via CircuitPython.org
Click the link above and download the latest UF2 file.
Download and save it to your Desktop (or wherever is handy.)
Plug your Circuit Playground Express into your computer using a known-good USB cable.
A lot of people end up using charge-only USB cables and it is very frustrating! So, make sure you have a USB cable you know is good for data sync.
Double-click the small Reset button in the middle of the CPX, you will see all of the LEDs turn green. If they turn all red, check the USB cable, try another USB port, etc.
(If double-clicking doesn't do it, try a single-click!)
You will see a new disk drive appear called CPLAYBOOT.
Drag the adafruit-circuitpython-etc...uf2 file onto it.
The CPLAYBOOT drive will disappear, and a new disk drive will appear called CIRCUITPY.
That's it! You're done :)
Further Information
For more detailed info on installing CircuitPython, check out Installing CircuitPython.
Code the Halloween Bat
Once you've finished setting up your Circuit Playground Express with CircuitPython, you can access the code and necessary libraries by downloading the Project Bundle.
To do this, click on the Download Project Bundle button in the window below. It will download as a zipped folder.
# SPDX-FileCopyrightText: 2022 Liz Clark for Adafruit Industries
#
# SPDX-License-Identifier: MIT

import time
import board
import pwmio
import neopixel
from adafruit_motor import servo
from adafruit_led_animation.animation.comet import Comet
from adafruit_led_animation.sequence import AnimationSequence
from adafruit_led_animation.color import PURPLE

#  create 2 PWM instances for the servos
left_pwm = pwmio.PWMOut(board.A3, duty_cycle=2 ** 15, frequency=50)
right_pwm = pwmio.PWMOut(board.A6, duty_cycle=2 ** 15, frequency=50)

#  left wing servo
left_servo = servo.Servo(left_pwm)
#  right wing servo
right_servo = servo.Servo(right_pwm)

#  use onboard neopixels on CPX
pixel_pin = board.NEOPIXEL
#  number of onboard neopixels
num_pixels = 10

#  neopixels object
pixels = neopixel.NeoPixel(pixel_pin, num_pixels, brightness=0.05, auto_write=False)

#  comet animation
comet = Comet(pixels, speed=0.01, color=PURPLE, tail_length=10, bounce=True)

#  create animation sequence
animations = AnimationSequence(comet)

#  beginning angles for each wing
left_angle = 100
right_angle = 30
#  minimum range for the servos
min_range = 30
#  maximum range for the servos
max_range = 100
#  the change in degrees for the servos
degree_change = 10
#  it's not recommended to go faster than 0.05
speed = 0.05

while True:
	#  run comet animation while servos move
    animations.animate()

	#  left angle decreases by 10
    left_angle = left_angle - degree_change
	#  once it's less than 30 degrees, reset to 100
    if left_angle < min_range:
        left_angle = max_range
	#  right angle increases by 10
    right_angle = right_angle + degree_change
	#  once it's greater than 100, reset to 30
    if right_angle > max_range:
        right_angle = min_range
	#  move left wing
    left_servo.angle = left_angle
	#  move right wing
    right_servo.angle = right_angle
	#  delay
time.sleep(0.05)Upload the Code and Libraries to the Circuit Playground Express
After downloading the Project Bundle, plug your Circuit Playground Express into the computer's USB port with a known good USB data+power cable. You should see a new flash drive appear in the computer's File Explorer or Finder (depending on your operating system) called CIRCUITPY. Unzip the folder and copy the following items to the Circuit Playground Express' CIRCUITPY drive.
lib folder
code.py
Your Circuit Playground Express CIRCUITPY drive should look like this after copying the lib folder and the code.py file.
How the CircuitPython Code Works
The code begins by setting up two pins for the servo motors to have PWM out. Then left_servo and right_servo is created as servo objects.
#  create 2 PWM instances for the servos
left_pwm = pwmio.PWMOut(board.A3, duty_cycle=2 ** 15, frequency=50)
right_pwm = pwmio.PWMOut(board.A6, duty_cycle=2 ** 15, frequency=50)

#  left wing servo
left_servo = servo.Servo(left_pwm)
#  right wing servo
right_servo = servo.Servo(right_pwm)
The onboard NeoPixels are used for this project. The pin to access them is board.NEOPIXEL. Then, pixels is setup as the NeoPixel object.
#  use onboard neopixels on CPX
pixel_pin = board.NEOPIXEL
#  number of onboard neopixels
num_pixels = 10

#  neopixels object
pixels = neopixel.NeoPixel(pixel_pin, num_pixels, brightness=0.05, auto_write=False)
The Comet animation is setup and added to the AnimationSequence(). If you want to change the color for the animation, you would change the color property.
#  comet animation
comet = Comet(pixels, speed=0.01, color=PURPLE, tail_length=10, bounce=True)

#  create animation sequence
animations = AnimationSequence(comet)
There are a few variables for the servo motor angles that are defined before the loop. You can change these values to customize the look of your bat's wing flapping.
min_range and max_range define the angle range of the wings. Change these values if you want to increase or decrease the range of the motor angles between 0 and 180. degree_change is the rate of movement for the motors. If you increase this value, the motors will move more abruptly; decrease the value and the motors will move more incrementally. speed is the delay amount in the loop and as a result, determines how fast the servo motors move.
#  beginning angles for each wing
left_angle = 100
right_angle = 30
#  minimum range for the servos
min_range = 30
#  maximum range for the servos
max_range = 100
#  the change in degrees for the servos
degree_change = 10
#  it's not recommended to go faster than 0.05
speed = 0.05
In the loop, animations.animate() allows the comet NeoPixel animation to run as long as the code is running.
#  run comet animation while servos move
    animations.animate()
The servos move like mirror images of each other to imitate a wing flapping motion. As a result, the angle of the servo on the left increases while the angle of the servo on the right decreases.
The left_angle value decreases by the value of degree_change. Once its value is less than min_range, its reset to max_range.
#  left angle decreases by 10
    left_angle = left_angle - degree_change
	#  once it's less than 30 degrees, reset to 100
    if left_angle < min_range:
        left_angle = max_range
The right_angle value increases by the value of degree_change. Once its value is greater than max_range, its reset to min_range.
#  right angle increases by 10
    right_angle = right_angle + degree_change
	#  once it's greater than 100, reset to 30
    if right_angle > max_range:
        right_angle = min_range
The servos move by changing the value of their angle property.
#  move left wing
    left_servo.angle = left_angle
	#  move right wing
    right_servo.angle = right_angle
	#  delay
    time.sleep(speed)
MakeCode Version
Another option for your flapping vampire bat is to code it with MakeCode. You can drag and drop the .UF2 code file onto your Circuit Playground Express to quickly prepare your bat to take flight.
Microsoft MakeCode for Adafruit is a web-based code editor that provides a block editor, similar to Scratch or Code.org, and also a JavaScript editor for more advanced users.
If you've never used the Circuit Playground Express with MakeCode before, this guide is a good place to start.
MakeCode for Circuit Playground Express Learn Guide
Wiring
For this version, the left-wing servo data cable is attached to pin A1, and the right-wing servo data cable is attached to pin A2.
The Code
To download the code, click the download link at the bottom of the window. To edit the code in MakeCode, click the box with arrow icon in the upper right corner of the window.
Microsoft MakeCode | Terms of Use | Privacy | Download
You can also download the compiled .UF2 file directly below.
circuitplayground-cpxHalloweenBat.uf2
How to Upload Code
To upload code to Circuit Playground Express, follow these instructions:
1) Connect your Circuit Playground Express to your computer using a known, good data+power micro-USB cable and press the small reset button in the center of the board. All the LEDs will flash red briefly, then turn green. Your computer should now show a removable drive called CPLAYBOOT.
2) Click the Download button in the code window below to download the .UF2 file to your computer.
3) Now drag and drop the .UF2 file onto the CPLAYBOOT drive in your computer's file explorer or finder.
Once the file is dragged onto CPLAYBOOT, the drive will automatically eject itself (your computer may give you a "failed to eject drive correctly" error, you can ignore this). The code is now on your Circuit Playground Express and ready to run!
Note: If you get a drive named CIRCUITPY, no worries! Press the reset button twice to get a flash drive named CPLAYBOOT. The project will not run if copied onto the CIRCUITPY drive as it is for CircuitPython.
How the Code Works
When the code begins, a few variables are defined:
right_angle - the angle of the servo for the right wing
left_angle - the angle of the servo for the left wing
min_range - the minimum angle for the servos
max_range - the maximum angle for the servos
speed - the length of the delay
degree_change - the amount of movement for the servos
In the loop, the NeoPixels display a rainbow animation while the code is running. Then, the left_angle and right_angle values are changed by the degree_change. If either value leaves the range defined by min_range and max_range, then the values are reset. The servo pins set the servo angles to the left_angle for the left wing and right_angle for the right wing.
Assembly
Wiring
Take the servo that will be mounted as the right wing and attach its alligator clips to the Circuit Playground Express.
Servo ground (black wire) to board GND
Servo power (red wire) to board 3.3V
Servo data (white wire) to board A6/RX
Take the servo that will be mounted as the left wing and attach its alligator clips to the Circuit Playground Express.
Servo ground (black wire) to board GND
Servo power (red wire) to board 3.3V
Servo data (white wire) to board A3
Mount the Circuit Playground Express
Mount the Circuit Playground Express with the M3 standoffs from the bolt-on kit to the bat body. Utilize the following pads for mounting:
A2
A1
A0
A7
A5
A4
Mount the Servo Motors
Mount the servos to the bat body using M2 screws. Make sure they are oriented with the circular motor gear at the top.
Attach the Wings
Attach each bat wing to their respective servo gear with an M2 screw.
Alternative Mounting
If you have trouble getting the M2 screw for the wings to be tight enough, you can glue one of the servo horns to the wing and mount them that way.
Usage
Plug the Circuit Playground Express into a USB power supply or a battery pack with the JST battery port. The bat will power up and you'll see its wings start flapping, along with the NeoPixel comet animation.
There are a few parameters in the code that you can customize for different effects.
You can adjust the angle range (min_range and max_range) of the wings and the number of degrees that the wings move each time (degree_change) for different flapping effects.
You can change the color of the animation for the NeoPixels. You can also change the animation that shows on the NeoPixels. Check out the CircuitPython LED Animations guide to see the other options available in the library.
CircuitPython LED Animations Learn Guide