Mfr Part # 4000
METRO M4 EXPRESS AIRLIFT WIFI
Adafruit Industries LLC
License: See Original Project
Courtesy of Adafruit
Guide by John Park
Overview
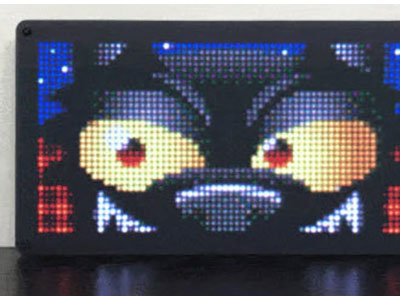
Always know the current weather without even sticking you head out the window with the Weather Display Matrix.
Using CircuitPython, this project queries the Open Weather Maps site API to find out the current weather for your location. It displays the temperature and weather condition icon, while scrolling additional details such as humidity and conditions.
Want to change between Imperial and metric units? We've got you covered! Use the Matrix Portal buttons or the added jumper on the Metro M4 Airlift's pin D12 to do so.
Parts
or
Adafruit Matrix Portal - CircuitPython Powered Internet Display
Black LED Diffusion Acrylic Panel 12" x 12" - 0.1" / 2.6mm thick
Micro B USB to USB C Adapter
Optional
Using M4 Airlift
If you have a Metro M4 AirLift, you can build this project easily - you just need an RGB Matrix shield to help connect!
You will need a Metro M4 Airlift, matrix shield and matrix.
Install CircuitPython
CircuitPython is a derivative of MicroPython designed to simplify experimentation and education on low-cost microcontrollers. It makes it easier than ever to get prototyping by requiring no upfront desktop software downloads. Simply copy and edit files on the CIRCUITPY drive to iterate.
Set up CircuitPython Quick Start!
Follow this quick step-by-step for super-fast Python power :)
Download the latest version of CircuitPython for this board via circuitpython.org
Further Information
For more detailed info on installing CircuitPython, check out Installing CircuitPython.
Click the link above and download the latest UF2 file.
Download and save it to your desktop (or wherever is handy).
Plug your Metro M4 into your computer using a known-good USB cable.
A lot of people end up using charge-only USB cables and it is very frustrating! So, make sure you have a USB cable you know is good for data sync.
Double-click the Reset button next to the USB connector on your board, and you will see the NeoPixel RGB LED (indicated by the arrow) turn green. If it turns red, check the USB cable, try another USB port, etc.
If double-clicking doesn't work the first time, try again. Sometimes it can take a few tries to get the rhythm right!
You will see a new disk drive appear called METROM4BOOT.
Drag the adafruit_circuitpython_etc.uf2 file to METROM4BOOT.
The LED will flash. Then, the METROM4BOOT drive will disappear, and a new disk drive called CIRCUITPY will appear.
That's it, you're done! :)
Build Metro M4 Airlift Matrix Display
Assembly
Talking to an LED matrix display can be tricky! The 64 x 32 LED used here has a whopping 2,048 pixels, and each can display RGB colors, which makes for a whole lot of data to sling around. Thankfully, our RGB Matrix shield paired with the Metro M4 Airlift does most of the heavy lifting.
Let's assemble the boards and the display so we can get things running!
Shields Up
First, add the male headers, screw terminal block, and the 8x2-pin socket to the Matrix shield, by following this guide. Be careful to match the socket polarity to the silkscreen image on the board.
Be sure to also perform the clock pin mod as shown here.
Then plug the shield into the Metro M4 Airlift.
Power Connections
To provide power, we'll screw the wiring harness connectors to the screw terminal blocks of the shield. Be sure to match the black wire to GND and the red wire to +5Vout.
Now, simply plug the other end into the panel's power header. It can only go in one way.
Data Cable
Plug in the two ends of the ribbon cable, note that the connectors are keyed to only fit in the correct orientation.
Wall Adapter
We'll power the Metro M4 from the 5V 2.5 (or a 4A) DC wall adapter plugged into the barrel jack. Even though USB can provide power to the board, the current isn't adequate for lighting up hundreds and thousands of LEDs!
For info on adding LED diffusion acrylic, see the page LED Matrix Diffuser.
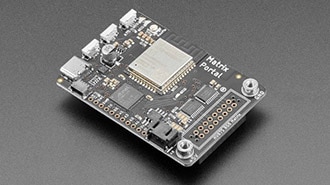
Using MatrixPortal
You can build this project with an all-in-one Matrix Portal board, it’s definitely the easiest and least-expensive way to go about it.
You will need a matrix portal, matrix, and USB C power/data cable.
Prep the MatrixPortal
Power Prep
The MatrixPortal supplies power to the matrix display panel via two standoffs. These come with protective tape applied (part of our manufacturing process) which MUST BE REMOVED!
Use some tweezers or a fingernail to remove the two amber circles.
Power Terminals
Next, screw in the spade connectors to the corresponding standoff.
red wire goes to +5V
black wire goes to GND
Panel Power
Plug either one of the four-conductor power plugs into the power connector pins on the panel. The plug can only go in one way, and that way is marked on the board's silkscreen.
Board Connection
Now, plug the board into the left side shrouded 8x2 connector as shown. The orientation matters, so take a moment to confirm that the white indicator arrow on the matrix panel is oriented pointing up and right as seen here and the MatrixPortal overhangs the edge of the panel when connected. This allows you to use the edge buttons from the front side.
Check nothing is impeding the board from plugging in firmly. If there's a plastic nub on the matrix that's keeping the Portal from sitting flat, cut it off with diagonal cutters.
For info on adding LED diffusion acrylic, see the page LED Matrix Diffuser.
Install CircuitPython
CircuitPython is a derivative of MicroPython designed to simplify experimentation and education on low-cost microcontrollers. It makes it easier than ever to get prototyping by requiring no upfront desktop software downloads. Simply copy and edit files on the CIRCUITPY drive to iterate.
Set up CircuitPython Quick Start!
Follow this quick step-by-step for super-fast Python power :)
Download the latest version of CircuitPython for this board via circuitpython.org
Further Information
For more detailed info on installing CircuitPython, check out Installing CircuitPython.
Click the link above and download the latest UF2 file.
Download and save it to your desktop (or wherever is handy).
Plug your MatrixPortal M4 into your computer using a known-good USB cable.
A lot of people end up using charge-only USB cables and it is very frustrating! So, make sure you have a USB cable you know is good for data sync.
Double-click the Reset button (indicated by the green arrow) on your board, and you will see the NeoPixel RGB LED (indicated by the magenta arrow) turn green. If it turns red, check the USB cable, try another USB port, etc.
If double-clicking doesn't work the first time, try again. Sometimes it can take a few tries to get the rhythm right!
You will see a new disk drive appear called MATRIXBOOT.
Drag the adafruit_circuitpython_etc.uf2 file to MATRIXBOOT.
The LED will flash. Then, the MATRIXBOOT drive will disappear, and a new disk drive called CIRCUITPY will appear.
That's it, you're done! :)
Code the Weather Display Matrix
Libraries
We'll need to make sure we have these libraries installed. (Check out this link on installing libraries if needed.)
adafruit_bitmap_font
adafruit_bus_device
adafruit_display_shapes
adafruit_display_text
adafruit_esp32spi
adafruit_io
adafruit_matrixportal
adafruit_requests.mpy
neopixel.mpy
Connect to the Internet
Once you have CircuitPython setup and libraries installed we can get your board connected to the Internet. The process for connecting can be found here.
Text Editor
Adafruit recommends using the Mu editor for editing your CircuitPython code. You can get more info in this guide.
Alternatively, you can use any text editor that saves simple text files.
Code
Click the Download: Zip File link below in the code window to get a zip file with all the files needed for the project. Copy weather_display_matrix.py from the zip file and place on the CIRCUITPY drive, then rename it to code.py.
You'll also need to copy the following files to the CIRCUITPY drive. See the graphic at the top of the page as to filenames and where they go):
fonts directory, which contains three bitmap fonts
loading.bmp
openweather_graphics.py
weather-icons.bmp
secrets.py (after you edit to put your Wi-Fi and weather credentials in the file, noted below)
# SPDX-FileCopyrightText: 2020 John Park for Adafruit Industries
#
# SPDX-License-Identifier: MIT

# Matrix Weather display
# For Metro M4 Airlift with RGB Matrix shield, 64 x 32 RGB LED Matrix display

"""
This example queries the Open Weather Maps site API to find out the current
weather for your location... and display it on a screen!
if you can find something that spits out JSON data, we can display it
"""
import time
import board
import microcontroller
from digitalio import DigitalInOut, Direction, Pull
from adafruit_matrixportal.network import Network
from adafruit_matrixportal.matrix import Matrix
import openweather_graphics  # pylint: disable=wrong-import-position

# Get wifi details and more from a secrets.py file
try:
    from secrets import secrets
except ImportError:
    print("WiFi secrets are kept in secrets.py, please add them there!")
    raise

if hasattr(board, "D12"):
    jumper = DigitalInOut(board.D12)
    jumper.direction = Direction.INPUT
    jumper.pull = Pull.UP
    is_metric = jumper.value
elif hasattr(board, "BUTTON_DOWN") and hasattr(board, "BUTTON_UP"):
    button_down = DigitalInOut(board.BUTTON_DOWN)
    button_down.switch_to_input(pull=Pull.UP)

    button_up = DigitalInOut(board.BUTTON_UP)
    button_up.switch_to_input(pull=Pull.UP)
    if not button_down.value:
        print("Down Button Pressed")
        microcontroller.nvm[0] = 1
    elif not button_up.value:
        print("Up Button Pressed")
        microcontroller.nvm[0] = 0
    print(microcontroller.nvm[0])
    is_metric = microcontroller.nvm[0]
else:
    is_metric = False

if is_metric:
    UNITS = "metric"  # can pick 'imperial' or 'metric' as part of URL query
    print("Jumper set to metric")
else:
    UNITS = "imperial"
    print("Jumper set to imperial")

# Use cityname, country code where countrycode is ISO3166 format.
# E.g. "New York, US" or "London, GB"
LOCATION = "Los Angeles, US"
print("Getting weather for {}".format(LOCATION))
# Set up from where we'll be fetching data
DATA_SOURCE = (
    "http://api.openweathermap.org/data/2.5/weather?q=" + LOCATION + "&units=" + UNITS
)
DATA_SOURCE += "&appid=" + secrets["openweather_token"]
# You'll need to get a token from openweather.org, looks like 'b6907d289e10d714a6e88b30761fae22'
# it goes in your secrets.py file on a line such as:
# 'openweather_token' : 'your_big_humongous_gigantor_token',
DATA_LOCATION = []
SCROLL_HOLD_TIME = 0  # set this to hold each line before finishing scroll

# --- Display setup ---
matrix = Matrix()
network = Network(status_neopixel=board.NEOPIXEL, debug=True)
if UNITS in ("imperial", "metric"):
    gfx = openweather_graphics.OpenWeather_Graphics(
        matrix.display, am_pm=True, units=UNITS
    )

print("gfx loaded")
localtime_refresh = None
weather_refresh = None
while True:
    # only query the online time once per hour (and on first run)
    if (not localtime_refresh) or (time.monotonic() - localtime_refresh) > 3600:
        try:
            print("Getting time from internet!")
            network.get_local_time()
            localtime_refresh = time.monotonic()
        except RuntimeError as e:
            print("Some error occured, retrying! -", e)
            continue

    # only query the weather every 10 minutes (and on first run)
    if (not weather_refresh) or (time.monotonic() - weather_refresh) > 600:
        try:
            value = network.fetch_data(DATA_SOURCE, json_path=(DATA_LOCATION,))
            print("Response is", value)
            gfx.display_weather(value)
            weather_refresh = time.monotonic()
        except RuntimeError as e:
            print("Some error occured, retrying! -", e)
            continue

    gfx.scroll_next_label()
    # Pause between labels
time.sleep(SCROLL_HOLD_TIME)Open Weather Maps API Key
We'll be using OpenWeatherMaps.org to retrieve the weather info through its API. In order to do so, you'll need to register for an account and get your API key.
Go to this link and register for a free account. Once registered, you'll get an email containing your API key, also known as the "openweather token".
Copy and paste this key into your secrets.py file that is on the root level of your CIRCUITPY drive, so it looks something like this:
secrets = {
        'ssid' : 'your_wifi_ssid',
        'password' : 'your_wifi_password',
        'openweather_token' : 'xxxxxxxxxxxxxxxxxxxxxxxx'
    }
Adafruit IO Time Server
In order to get the precise time, our project will query the Adafruit IO Internet of Things service for the time. Adafruit IO is absolutely free to use, but you'll need to log in with your Adafruit account to use it. If you don't already have an Adafruit login, create one here.
If you haven't used Adafruit IO before, check out this guide for more info.
Once you have logged into your account, there are two pieces of information you'll need to place in your secrets.py file: Adafruit IO username, and Adafruit IO key. Head to io.adafruit.com and simply click the View AIO Key link on the left-hand side of the Adafruit IO page to get this information.
Then, add them to the secrets.py file like this:
secrets = {
    'ssid' : 'your_wifi_ssid',
    'password' : 'your_wifi_password',
    'openweather_token' : 'xxxxxxxxxxxxxxxxxxxxxxxx',
    'aio_username' : '_your_aio_username_',
    'aio_key' : '_your_big_huge_super_long_aio_key_'
}
Problems Getting Data
If you have any problems getting the data to display correctly, check that the secrets.py file has the information noted above.
How it Works
Libraries
First, we import libraries to help us behind the scenes. time will allow us to pause between weather queries. board gives us pin definitions. And we'll use the digitalio library to query a DigitalInOut pin in the input Direction with Pull down resistor for mode selection.
The adafruit_matrixportal library will be used both for Network queries and for controlling the Matrix display.
We'll also import the openweather_graphics class to take care of the graphics, text display, scrolling and more.
Secrets
Next, we import the secrets needed for Wi-Fi access point connection, Open Weather Maps key, and more.
Units
Want to change between Imperial and metric units? We've got you covered! Use the Matrix Portal buttons or the added jumper on the Metro M4 Airlift's pin D12 to do so.
Jumper
For the Metro M4 Airlift version, next we set up a digital input pin and a variable called jumper in order to switch the device from imperial to metric units.
Buttons
For the Matrix Portal version, we can use the on-board buttons instead. By holding down one of the buttons while you power on the Matrix Portal, you can set unit mode of the display. The value is stored in non-volatile memory and is automatically used the next time the Matrix Portal is powered on.
Hold Down for metric mode
Hold Up for imperial mode
if hasattr(board, "D12"):
    jumper = DigitalInOut(board.D12)
    jumper.direction = Direction.INPUT
    jumper.pull = Pull.UP
    is_metric = jumper.value
elif hasattr(board, "BUTTON_DOWN") and hasattr(board, "BUTTON_UP"):
    button_down = DigitalInOut(board.BUTTON_DOWN)
    button_down.switch_to_input(pull=Pull.UP)

    button_up = DigitalInOut(board.BUTTON_UP)
    button_up.switch_to_input(pull=Pull.UP)
    if not button_down.value:
        print("Down Button Pressed")
        microcontroller.nvm[0] = 1
    elif not button_up.value:
        print("Up Button Pressed")
        microcontroller.nvm[0] = 0
    print(microcontroller.nvm[0])
    is_metric = microcontroller.nvm[0]
else:
    is_metric = False

if is_metric:
    UNITS = "metric"  # can pick 'imperial' or 'metric' as part of URL query
    print("Jumper set to metric")
else:
    UNITS = "imperial"
    print("Jumper set to imperial")
Data
We'll set a variable for the DATA_SOURCE which will be used to query Open Weather Maps API next. This query will use the LOCATION and UNITS variables to form the request.
LOCATION = "Los Angeles, US"
print("Getting weather for {}".format(LOCATION))
DATA_SOURCE = (
    "http://api.openweathermap.org/data/2.5/weather?q=" + LOCATION + "&units=" + UNITS
)
DATA_SOURCE += "&appid=" + secrets["openweather_token"]
API Query and JSON
Using this information, the code can then send a query to Open Weather Maps's API that looks something like this:
http://api.openweathermap.org/data/2.5/weather?q=Los Angeles, US&appid=xxxxxxxxxxxxxxxxxxxxxxxxxxxxxxx
(where all of those 'x's are your token).
When this query is complete, it returns a JSON file that looks like this:
{
  "coord": {
    "lon": -118.24,
    "lat": 34.05
  },
  "weather": [
    {
      "id": 501,
      "main": "Rain",
      "description": "moderate rain",
      "icon": "10d"
    }
  ],
  "base": "stations",
  "main": {
    "temp": 287.42,
    "pressure": 1016,
    "humidity": 50,
    "temp_min": 285.15,
    "temp_max": 289.15
  },
  "visibility": 16093,
  "wind": {
    "speed": 3.6,
    "deg": 300
  },
  "rain": {
    "1h": 1.52
  },
  "clouds": {
    "all": 75
  },
  "dt": 1552073935,
  "sys": {
    "type": 1,
    "id": 3514,
    "message": 0.0087,
    "country": "US",
    "sunrise": 1552054308,
    "sunset": 1552096542
  },
  "id": 5368361,
  "name": "Los Angeles",
  "cod": 200
}
JSON Traversal
The JSON file is formatted in a way that makes it easy to traverse the hierarchy and parse the data. In it, you'll see keys, such as main, description, icon, and temp, and their respective values. So, here are some key: value pairs we care about for the weather station:
"main" : "Rain"
"description" : "moderate rain"
"icon" : "10d"
"temp" : "287.42"
In order to fetch this data from the file, we need to be able to describe their locations in the file hierarchically. This is helpful, for example, in differentiating between the 'main' weather condition and the 'main' section containing temperature and other data. To avoid name clashing we rely on JSON traversal.
In the openweather_graphics.py file, you'll see how this is done. For example, the main key is found in this hierarchy of the JSON file: ['weather'], [0], ['main']
This means there is a key at the top level of the JSON file called 'weather', which has a sub-tree indexed [0], and then below that is the 'main' key.
This process is used to cast the values of the temperature, weather, description, and which icon to display from the directory of bitmap icons.
Scroll Time
You can customize your scroll hold time here:
SCROLL_HOLD_TIME = 0 # set this to hold each line before finishing scroll
Setting this value to 0 means there will not be a hold when a line of text reaches the edge of the display.
Display and Network Setup
The display and network setup are next, along with setting the call to the openweather_graphics class:
matrix = Matrix()
network = Network(status_neopixel=board.NEOPIXEL, debug=True)
if UNITS == "imperial" or UNITS == "metric":
    gfx = openweather_graphics.OpenWeather_Graphics(
        matrix.display, am_pm=True, units=UNITS
    )
Main Loop
In the main loop we check the online time server once an hour to stay in sync with internet time, and we check the weather data every ten minutes, using the gfx call to the openweather_graphics class.
if (not localtime_refresh) or (time.monotonic() - localtime_refresh) > 3600:
        try:
            print("Getting time from internet!")
            network.get_local_time()
            localtime_refresh = time.monotonic()
        except RuntimeError as e:
            print("Some error occured, retrying! -", e)
            continue

    # only query the weather every 10 minutes (and on first run)
    if (not weather_refresh) or (time.monotonic() - weather_refresh) > 600:
        try:
            value = network.fetch_data(DATA_SOURCE, json_path=(DATA_LOCATION,))
            print("Response is", value)
            gfx.display_weather(value)
            weather_refresh = time.monotonic()
        except RuntimeError as e:
            print("Some error occured, retrying! -", e)
            continue
With the json data from Open Weather Maps parsed, we can then scroll through the text labels for weather description, humidity, wind speed, and location.
LED Matrix Diffuser
LED Diffusion Acrylic
You can add an LED diffusion acrylic faceplate to your LED matrix display. (Pictured here with the ON AIR project)
This can help protect the LEDs as well as enhance the look of the sign both indoors and out by reducing glare and specular highlights of the plastic matrix grid.
Measure and Cut the Plastic
You can use the sign to measure, and mark cut lines on the paper backing of the acrylic sheet.
Then, use a tablesaw or bandsaw with a fine-toothed blade and a guide or sled to make the cuts.
Note: It is possible to score and snap acrylic, but it can be very tricky to get an even snap without proper clamping.
Peel away the paper backing from both sides and set the acrylic onto your matrix display.
Uglu Dashes
The best method we've found for adhering acrylic to the matrix display is to use Uglu Dashes clear adhesive rectangles from Pro Tapes. They are incredibly strong (although can be removed if necessary), easy to apply, and are invisible once attached.
Use one at each corner and one each at the halfway point of the long edges, then press the acrylic and matrix panel together for about 20 seconds.
Here you can see the impact of using the diffusion acrylic. (Pictured here with the ON AIR sign project)
Stand
A very simple and attractive way to display your matrix is with the adjustable bent-wire stand.
Alternately, you can use a frame, 3D printed brackets, tape, glue, or even large binder clips to secure the acrylic to the sign and then mount it on a wall, shelf, or display cabinet.
These mini-magnet feet can be used to stick the sign to a ferrous surface.